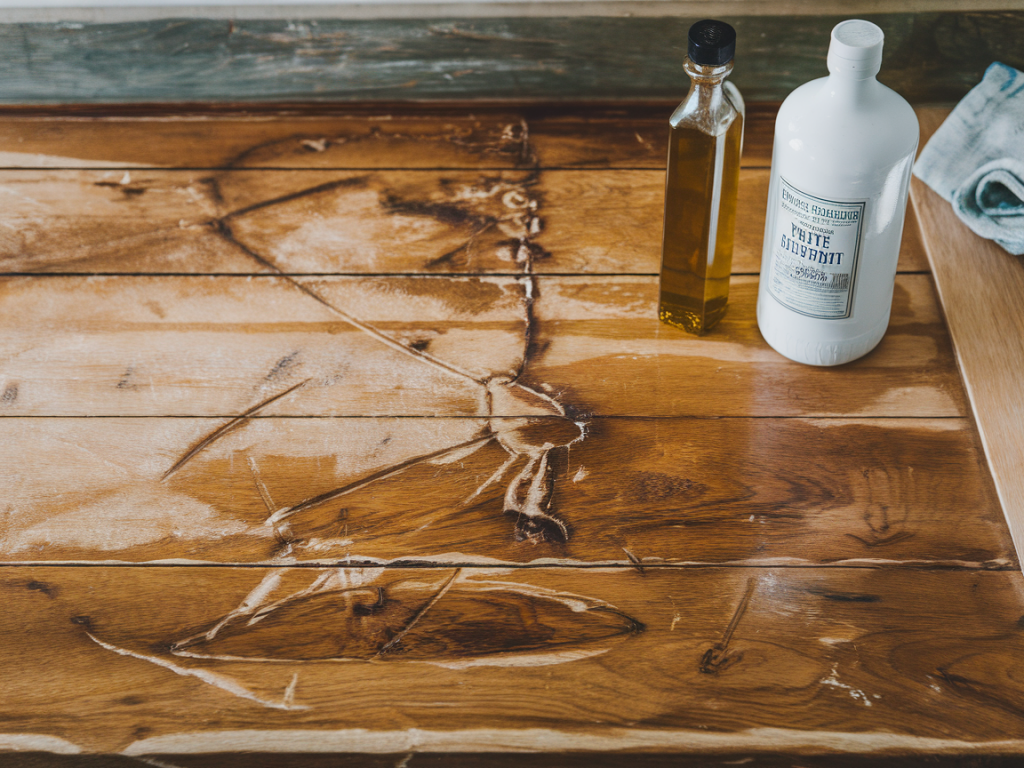
I had a wooden countertop that I loved for its warmth and grain, but over the years the beeswax finish had dried out, flaked and begun to look patchy. I didn’t want to strip the surface completely — the wood was in good shape and the original wax had built up in places — so I tried a gentle two‑step revival using olive oil, a little white spirit (mineral spirits), and careful buffing. The result was surprisingly fresh and natural feeling. Below I’ll share the exact method I used, why each step helps, safety notes, and troubleshooting tips in case your counter behaves differently.
Why this method works
Beeswax finishes are lovely because they’re simple and breathable, but they can harden and attract dirt. Olive oil is a mild, natural conditioner: it soaks into the wood and softens the wax slightly, bringing back some suppleness and warmth. White spirit is a gentle solvent that breaks down thicker, old wax buildup and residues so you can remove them without aggressive sanding. The two‑step buffing — first to redistribute and soften with oil, then to dissolve and remove with white spirit followed by a final polish — balances conditioning with cleaning, giving a refreshed, even finish.
Materials and tools
Here’s what I used — nothing fancy, mostly things you can find locally:
Optional: a small tin of beeswax paste (e.g., Liberon, Osmo) if you want to top up the finish afterwards.
| Item | Why I used it |
|---|---|
| Olive oil | Gentle wood conditioner; softens wax and revives grain |
| White spirit | Dissolves old wax and removes build-up without sanding |
| Soft cloths | Apply and buff without scratching |
| #0000 steel wool (optional) | Light abrasion for stubborn wax patches |
Safety first
Don’t skip this. White spirit is flammable and gives off vapours, so always work in a well‑ventilated room (open windows/doors). Wear gloves to protect your skin from both the oil and solvent. Dispose of oil‑ and solvent‑soaked rags in a metal container with a lid or lay them flat to dry outdoors — oily rags can self‑ignite if bunched up. Keep any solvents away from open flames and out of reach of children and pets.
Step‑by‑step revival
Test in an inconspicuous corner first. Every wood reacts differently, so I always check how the oil and white spirit affect colour and sheen before treating the whole surface.
What to expect — colour and texture changes
Your wood will darken slightly when it’s oiled — this is normal and usually very pleasing. The colour typically lightens a bit as the oil dries, but some permanent deepening can occur. If you’re worried about a dramatic change, test first. The surface should feel smoother and less chalky after treatment. If any areas feel sticky after everything has dried, you likely used too much oil; wipe again with a small amount of white spirit and buff thoroughly.
Troubleshooting
Aftercare and maintenance
I find doing a quick refresh every 6–12 months keeps my counters looking soft and nourished. For everyday care:
This approach is gentle, inexpensive and low‑fuss — it’s worked well for me on ash and oak counters. If you’d rather buy a ready wax product, brands like Osmo or Liberon make food‑safe finishing pastes that give a similar look with more durability. But for a quick, natural revival, olive oil + white spirit + careful buffing has brought my counter back to life without stripping the character I love.