I still remember the first time I stood in front of a flatpack shelf with nothing but a flimsy Allen key and a growing sense of dread. Over time I learned that you don't need a garage-full of expensive tools to tackle most basic DIY repairs — just a small, well-chosen kit, some patience, and a few simple habits. Here I’ll share the budget tools I’ve come to rely on as a beginner, why each one matters, and a few practical tips for buying and using them without blowing your savings.
What “budget” really means here
When I say budget, I mean tools that are affordable without being disposable. Spend a little more on a handful of reliable items and you’ll save money (and frustration) in the long run. I often pick tools from supermarket ranges like Aldi’s Specialbuy, or mid-range names such as Stanley, Draper or Tacklife — they’re inexpensive but solid enough for home projects.
The essential hand tools
These are the tools I reach for most days. They’re versatile, low-cost, and useful whether you’re patching a hole, hanging a picture, or tightening a loose cupboard hinge.
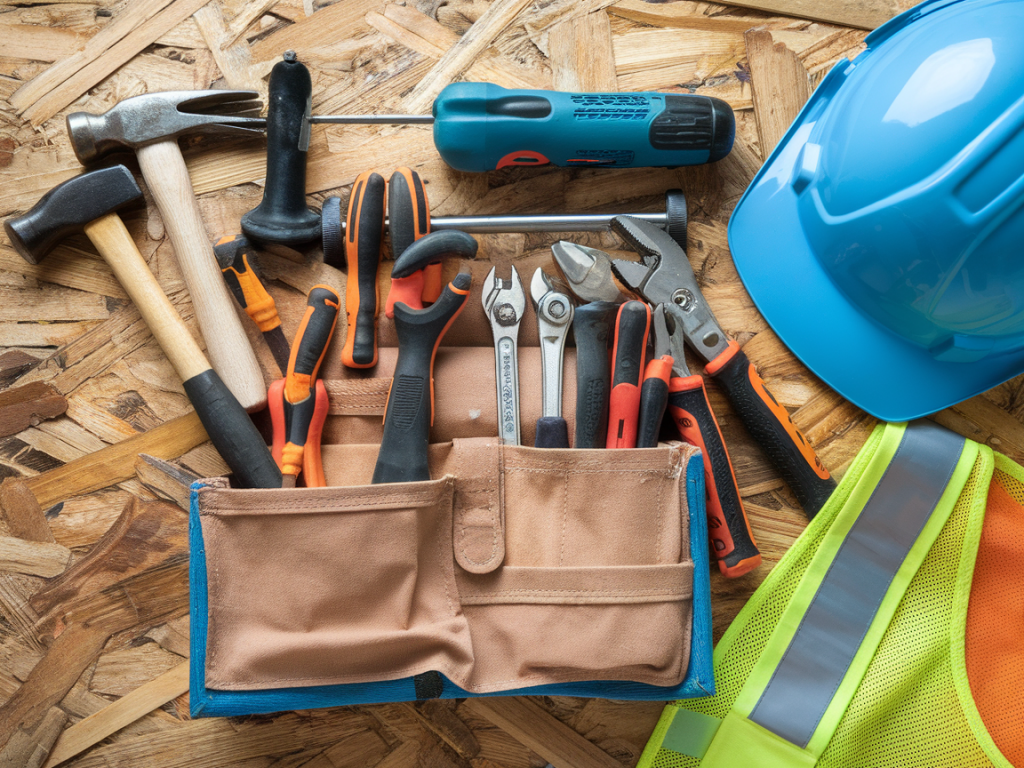
Claw hammer (16 oz) — A basic hammer is indispensable. The claw end removes nails and small fastenings. I prefer a comfortable grip; it makes a difference during longer fixes.Screwdriver set — Get a small set with flathead and Phillips heads. A stubby screwdriver is handy for tight spaces. Magnetic tips are a lovely little convenience for beginners.Adjustable wrench — Useful for plumbing odd jobs and assembling furniture. One medium size (8–10 inch) covers most needs.Set of pliers — Combination pliers and needle-nose pliers. They help with gripping, bending wire, and pulling staples.Tape measure (5m / 16ft) — I measure twice, cut once. A retractable tape with metric and imperial markings works best in a UK home where both are sometimes needed.Spirit level (60cm) — You don’t need a full-sized contractor level — a 60cm or even a bubble level app plus a small spirit level will help hang shelves and pictures straight.Utility knife (with spare blades) — The workhorse for trimming, opening packages, cutting caulk and scoring plasterboard. Keep blades sharp and change them often.Fastening and fixing
Once you have the basics, you’ll need a few supplies for attaching and repairing.
Assorted screws and wall plugs — A small selection box (6–10 sizes) covers plasterboard, masonry and light fixtures. I pick plastic plugs for light items and look for 'self-drilling' plasterboard anchors for heavier pieces.Picture-hanging kit — Hooks, D-rings and picture wire make hanging art straightforward. A set like the ones sold by Command are great for renters (leave less damage).WD-40 or similar lubricant — For squeaky hinges and sticky mechanisms. A small can lasts a long time.Super glue and PVA glue — Both have uses: super glue for quick small repairs and PVA for wood and porous materials.For cutting, drilling and light power jobs
You don’t need a home workshop full of power tools. A single affordable electric drill goes a long way.
Cordless drill/driver (12V) — Choose a lightweight model with a couple of torque settings and a battery that holds charge. A cheap Bosch or Ryobi model on sale is often perfect for drilling pilot holes and driving screws.Basic drill bit set — Get a mix of masonry, wood and metal bits (and a few spares).Compact jigsaw (optional) — If you plan to cut boards regularly, a small jigsaw is more versatile than a handsaw and often surprisingly affordable.Safety items I won’t skip
Safety is non-negotiable — skimp on it and you pay more in stress (and medical bills) later.
Safety glasses — Protect your eyes when drilling, sanding or hammering.Dust mask — For sanding and mixing plaster or paint.Work gloves — Thin nitrile for dexterity and heavier gloves for moving things.First aid kit — Keep it handy in the same cupboard as your tools.Storage and organisation
A small tidy box beats a jumble of tools on the kitchen table. I use a compact tool box or a plastic tote with compartments so screws and bits aren’t lost. Label small zip bags with sizes (e.g., 30mm wood screws) — it’s a tiny habit that saves time.
| Tool | Approx. cost (UK) | Why I like it |
| Claw hammer | £8–£20 | Durable, multifunctional |
| Screwdriver set | £6–£25 | Essential for most small jobs |
| Cordless drill (12V) | £30–£80 | Versatile for drilling and screwdriving |
| Tape measure (5m) | £5–£12 | Every project starts with measuring |
| Spirit level (60cm) | £5–£20 | Ensures straight hangings |
Practical buying tips
I buy most basics locally or during a sale. Here are a few rules I follow:
Prioritise comfort — If a tool fits well in your hand it’s easier to use and less likely to be mishandled.Avoid the cheapest drill — A truly cheap cordless drill often dies after a few months. Spend a little more for a known brand or pick a refurbished model.Look for kits — Starter kits with screwdrivers, a hammer, pliers and a tape measure are often a good value for beginners.Buy spare blades and bits — They’re cheap and keep you working without delays.Simple first projects to practice with
Practice makes confidence. Here are a few small projects where these tools shine:
Hanging a shelf or mirror — measure carefully, use a spirit level, and pick the right plugs for your wall.Tightening loose cabinet hinges — screwdriver and WD-40 for sticky parts.Replacing a door handle or latch — screwdriver and adjustable wrench for the nuts.Fixing a squeaky floorboard — use a hammer and a few screws to secure from below, or small wood glue if the board is split.I still keep my first inexpensive tool kit tucked under the stairs — it’s simple, cheerful, and it reminds me that small tools can make a big difference. Start with these essentials, add one new tool when a specific project calls for it, and before long you’ll have a compact, reliable set that makes home repairs approachable rather than intimidating.