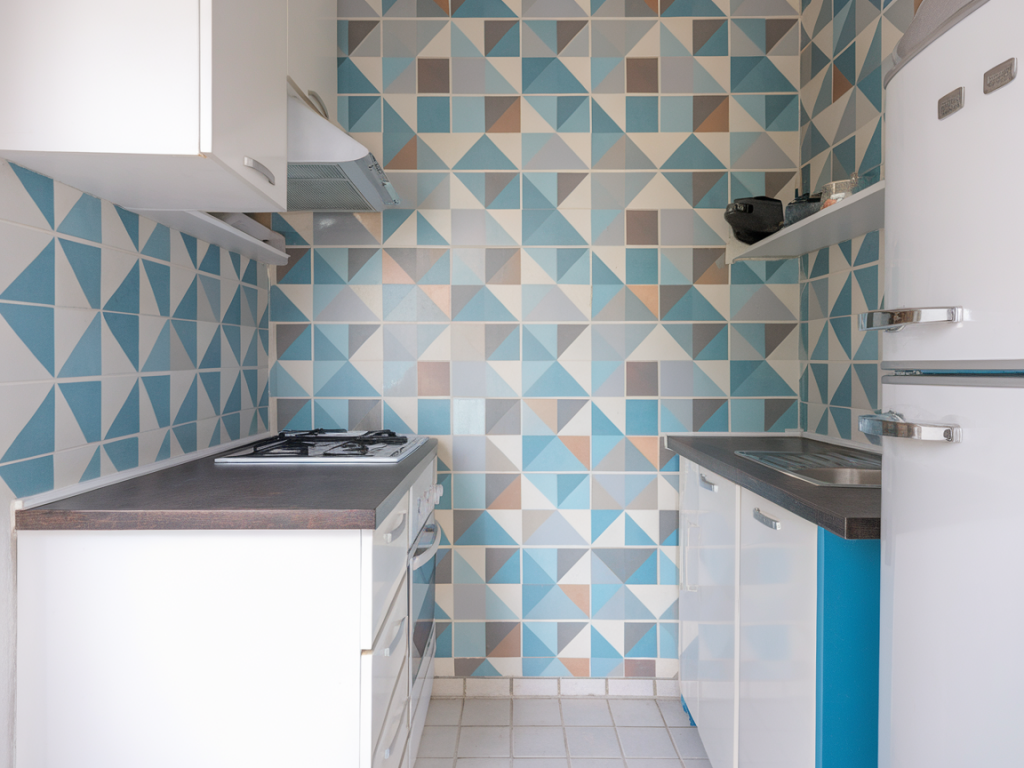
I moved into a tiny rented kitchen last month and, though the bones were fine, the space felt tired: scuffed walls, an outdated splashback, and a stubbornly dull countertop. I didn’t want to spend much (or make permanent changes), but I wanted the kitchen to feel brighter and more cheerful — a space where I’d enjoy sitting with a morning coffee and chopping vegetables. Over one weekend I refreshed it using peel-and-stick splashback tiles and about £40 of removable upgrades. Here’s exactly what I did, why I chose each item, and tips to help you do the same in a rental.
Why I chose peel-and-stick and small upgrades
When you rent, changes need to be reversible. Peel-and-stick tiles are a brilliant compromise: they look like real tiles, they’re quick to apply, and they come off cleanly if you follow the instructions. I also picked a few inexpensive, removable updates — a new tap aerator, non-slip shelf liners, a small rug, and simple hardware refreshes — to make the kitchen feel fresher without drilling or painting.
What I bought (and why)
- Peel-and-stick splashback tiles: I chose a white subway-style self-adhesive tile (you can find good options from brands like B&Q’s Evostick range, Tile Mountain, or online at Amazon). They reflect light and make a tiny kitchen feel larger.
- Removable adhesive hooks and Command strips: For hanging lightweight utensils, tea towels, and a small herb planter without damaging walls.
- Tap aerator (budget model): A new aerator can change the feel of an old tap — softer spray, less splatter, and often easier to clean.
- Non-slip shelf liners: These make cupboards feel tidier and protect surfaces from spills.
- Small washable rug runner: To warm the floor and add colour. I picked a narrow runner in a muted terracotta.
- Peel-and-stick brass-effect hardware: I used stick-on knobs to refresh a tired cupboard door where replacing hardware wasn’t allowed.
- A good microfibre cloth and mild cleaner: For prepping surfaces so adhesives stick well.
Budget breakdown
| Item | Estimated cost |
| Peel-and-stick tiles (enough for a small splashback) | £18 |
| Tap aerator | £6 |
| Non-slip shelf liners | £4 |
| Small rug runner | £6 |
| Peel-and-stick knobs / adhesive hooks | £4 |
| Total | £38 |
How I prepped the space (essential for success)
Prep is where many quick projects fail. I spent about 45 minutes cleaning, measuring, and planning which paid off massively.
- Wiped the wall with warm soapy water and a microfibre cloth to remove kitchen grease. For stubborn grime I used a 50/50 mix of white vinegar and water and let it dry completely.
- Measured the area carefully and cut the tiles to size with a utility knife and a metal ruler. It helps to lay them out first and dry-fit them so you can visualise the seams and avoid odd small slivers.
- Removed any obstacles: I took down light-weight wall decor, moved small appliances, and cleared the benchtop so I could work freely.
- Tested a small tile in an out-of-sight corner to ensure the adhesive would release cleanly later — this gave me confidence and saved stress.
Installing the peel-and-stick splashback (step-by-step)
My kitchen splashback area was about 90cm wide and 45cm high — a manageable size that only took me around 1 hour to install.
- Start at a corner: Peel back a small section of the backing and align the tile with your reference line (I used the edge of the counter and the corner of the cabinet as guides).
- Stick the tile gradually: Press one edge down, then flatten outwards to avoid air bubbles. Use a soft cloth or a plastic smoothing tool.
- Trim carefully: Where the tile met the window sill and benchtop I trimmed using a sharp blade and light pressure for clean lines.
- Grout-look seam options: For a subway tile look I used tiles with printed grout lines, but there are also peel-and-stick grout pens you can use to define seams if desired.
Small changes that make a big difference
After the splashback was on, I spent another hour on the finishing touches:
- Swapped the tap aerator — it took five minutes and instantly made washing up more pleasant.
- Placed a non-slip liner in the cupboard under the sink and in the plate rack so items feel less cluttered.
- Added stick-on brass-effect knobs to one drawer and a removable adhesive hook for a tea towel.
- Rolled out the runner to add warmth and a pop of colour; it also softens footsteps in a small kitchen.
- Hung a small herb planter with a Command hook — fresh basil and chives within arm’s reach felt like a tiny luxury.
Answers to common questions
Will peel-and-stick damage the wall when removed? If you follow the manufacturer’s instructions and remove slowly (pulling at a low angle), most quality peel-and-stick tiles come off cleanly. Avoid leaving them on for many years and test an offcut in a hidden spot if you’re worried.
How durable are peel-and-stick tiles around a cooker? They handle light splashes well but aren’t as heat-resistant as ceramic tile grout. If you cook frequently with high heat or heavy splattering, choose a product specifically rated for kitchen use and keep a light splash guard near the hob.
Can I use this on painted walls? Yes — provided the paint is sound and not flaky. Clean well and avoid textured paint; adhesive works best on smooth, matte surfaces.
What tools do I need? A sharp utility knife, metal ruler, cloth for smoothing, cleaning supplies, and measuring tape. No special tools required.
Final practical tips from my weekend
- Work in good light; natural light makes aligning tiles easier.
- Keep spare tiles — you’ll want them for future repairs or to test removal.
- Small changes add up: a runner, a new aerator, and tidy shelves make the space feel loved.
- Take photos as you go — they help if you need to replace anything later or show your landlord you kept changes reversible.
Refreshing a tiny rented kitchen doesn’t require a big budget or a lot of tools. With a calm afternoon, some careful prepping, and a few thoughtful purchases, you can create a brighter, more functional space that feels like yours — even temporarily. If you try this, I’d love to hear what tiles you chose and how you made the space your own.