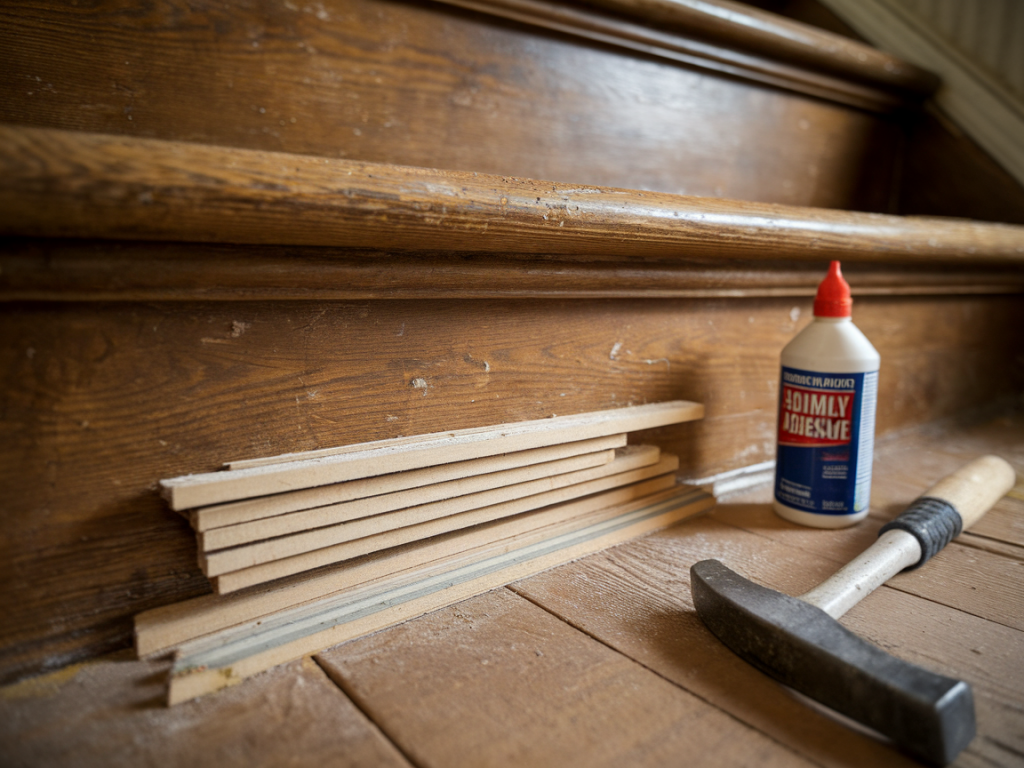
A loose stair tread is one of those small household annoyances that can feel both unsafe and naggingly obvious every time you climb the stairs. I recently tackled one in my own house with nothing more than a few simple tools, a couple of shims and some adhesive — no power tools, no dust, and no fuss. If you prefer quiet, low-mess fixes that actually last, this is a great technique to keep in your toolkit.
Why this method works
Many loose treads are caused by a small gap between the tread (the horizontal board you step on) and the stringer or riser it sits against. Over time wood shrinks, nails loosen, or the glue bond fails. By gently wedging in a thin shim to fill that gap and stabilising the joint with a strong adhesive, you recreate a snug contact between the pieces so the tread stops rocking. It’s simple physics and woodcraft — compress the gap and add a durable bond.
What I use and why
I like to keep the list short and inexpensive. Here’s what I used and what I recommend:
Thin wood shims — cedar or pine shims, available in packs from DIY stores. They’re tapered, so you can insert and trim them easily.Construction adhesive — I used Loctite PL Premium. Other good options are Liquid Nails or Gorilla Heavy Duty Construction Adhesive. They’re stronger than regular wood glue and gap-filling.Wood glue (optional) — Titebond Original if you prefer a cleaner, lower-expansion option for inside joints.Hammer and small block of scrap wood — to tap shims in without splitting them.Pry bar or flat screwdriver — to lift the tread very slightly if needed.Utility knife and handsaw or trim snips — for trimming excess shim.Sandpaper — 120–180 grit to smooth trimmed shim edges.Clamps or heavy weight (optional) — to hold the tread down while adhesive sets.Estimated cost: often under £15 if you already have basic tools. Time: around 30–60 minutes active work, more if adhesive needs longer to cure.
Safety and prep
Wear gloves and safety glasses when working with adhesives. Open a window for ventilation if you’re using solvent-based adhesives. Before you begin, try to identify whether the problem is a single loose tread or part of a larger structural issue:
If more than one tread is loose, or the stringer looks cracked or rotten, call a professional.If the wobble is localised and the stringer looks solid, this shim-and-adhesive fix is appropriate.Step-by-step: how I fixed my stair tread
Here’s the exact process I used. I’ve written it in a way that’s easy to follow even if you’re not confident with DIY.
Locate the gap and any old fasteners. Run your hand along the tread and riser. Wiggle the tread to find the movement direction and where the gap opens. Look underneath (in the stairwell or from below the staircase) to spot any nails that have backed out.Lift the tread slightly. If there’s no visible gap from above, slide a thin putty knife or a flat screwdriver under the front edge and gently lift to create just enough space to insert a shim. Don’t pry aggressively — you only need a few millimetres.Clean the joint. Remove dust and old glue with a brush or vacuum. A clean surface helps adhesives bond better.Test-fit a shim. Choose a thin shim and slide it into the gap. It should wedge in snugly but not forcefully. The tapered shape lets you control how tight it becomes. I often stack two very thin shims if one won’t sit flush.Apply adhesive. Remove the shim and apply a bead of construction adhesive into the gap on the stringer and the underside of the tread. If you prefer less-expanding glue, use a thin smear of Titebond along contact surfaces. For my stairs, PL Premium’s gap-filling properties were helpful because it fills small irregularities and expands a little to lock everything in place.Insert the shim and seat the tread. Push the shim back in, tapping gently with a hammer on a small block of wood to avoid splitting it. If you need to push the tread down to seat it against the riser, apply even pressure or use a clamp across the tread and riser (protect surfaces with scrap wood). Wipe any squeeze-out with a damp cloth before it cures.Trim the shim. Once the adhesive is in place and the shim has seated, trim the shim’s exposed end flush with the riser/tread seam using a utility knife or small saw. Sand lightly so the trimmed edge is smooth and not visible.Optional: add a discreet screw. For extra assurance in high-traffic homes, I sometimes drive a countersunk screw through the tread into the stringer. Use a 45–50mm wood screw and pre-drill a small pilot hole with a brad or awl (no power drill required if you have patience). Cover the screw head with a dab of wood filler coloured to match.Allow cure time. Follow the adhesive’s instructions; most construction adhesives reach useful strength within 24 hours but check manufacturer guidance for full cure.Final touch-ups. Once set, touch up paint or stain where needed. I keep a small jar of matching paint for quick fixes; it makes the repair disappear.Common questions I get asked
Will this damage my stairs? Not if you’re careful. The goal is to restore snug contact, not to force things apart. Work gently and use small tools.
Is construction adhesive safe for indoor use? Most are safe once cured, but they can be smelly while wet. Ventilate the area and follow the product safety advice on the tube.
Can I use normal wood glue? Yes, for very tight-fitting joints. Wood glue (PVA) is less forgiving of gaps. If the joint has even a small gap, a gap-filling construction adhesive is more reliable.
What about squeaks? A loose tread often squeaks as well. Filling the gap with shim and adhesive usually cures both wobble and squeak. If the squeak comes from a different contact point (e.g., a loose nosing), you may need a similar approach there.
Little tips I’ve learned
Take a photo of the tread underside before you start — it helps you remember where any old nails are and how things fit together.Keep extra shims and a small tube of adhesive in a labeled box. I fixed two more treads in the months after doing the first one — it pays to be ready.If you’re worried about smell, use an adhesive labelled “low VOC” or choose a water-based wood glue and accept that it’s best for tighter joints.When using shims on painted risers, slide a thin piece of cardboard between shim and riser when tapping — this prevents paint from chipping.I always feel a little glow of satisfaction after a repair like this. It’s quiet, immediate and keeps the house feeling cared for — which, for me, is the heart of small-scale DIY. If you try this, I’d love to hear how it goes and which adhesive and shims you ended up using; small variations make a surprising difference from home to home.