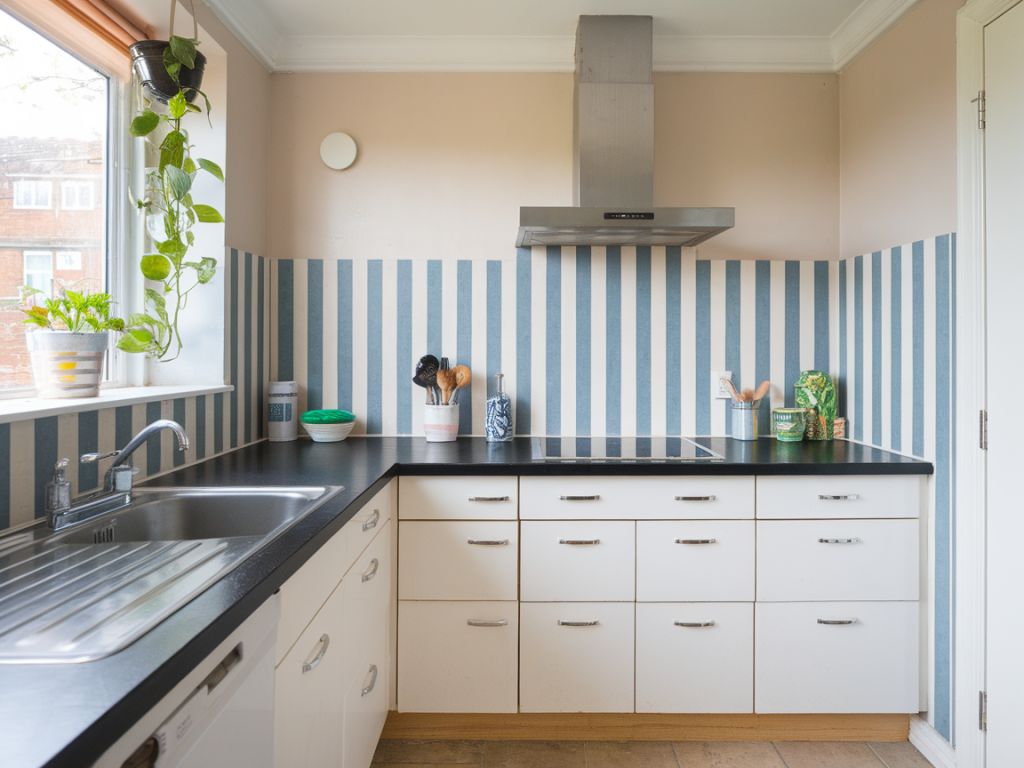
I moved into my current rented flat with a kitchen that was functional but uninspiring: beige laminate cupboards, tired handles and a backsplash that looked like it had been chosen in the 1990s and never questioned again. I couldn’t repaint the cabinets or replace worktops, but I still wanted the kitchen to feel like mine — warm, tidy and a little more considered. With just £40 and a peel-and-stick mindset, I transformed the look in a weekend. Here’s how I did it, what I learned and how you can do the same without risking your deposit.
Why peel-and-stick? Why £40?
Peel-and-stick products are the perfect middle ground for renters: they’re removable, low-commitment and often surprisingly good quality. They let you alter the mood of a kitchen without structural changes. I set myself a strict £40 budget to prove you don’t need to spend lots to get a bespoke feel — just careful choices and some thoughtful placement.
My aims were small and focused: make the cupboards look fresher, add interest to an awkward backsplash, and swap a few handles for instant polish. Those three moves are what make a space feel deliberately designed.
What I bought (and why)
Here’s the shopping list that stayed under £40. I shopped sales and discount stores (I used B&Q, Amazon and a discount peel-and-stick shop online). Prices vary, so I looked for coupons and free delivery options.
| Item | Estimated cost | Purpose |
|---|---|---|
| Peel-and-stick cabinet film (1 roll) | £12 | Refresh cupboard fronts with a clean, neutral finish |
| Peel-and-stick backsplash tiles (sheet) | £10 | Create a feature area behind hob/sink |
| New handles (pack of 6) | £12 | Swap dated hardware for simple brass or matte black |
| Small installation tools (squeegee, craft knife) | £6 | Neaten edges and help apply film smoothly |
Total: £40
Preparing the kitchen
Preparation is what separates a homemade finish from an amateur one. I cleared countertops, removed loose items from cupboards and cleaned every surface I planned to cover. Grease is the enemy of adhesive: wipe with a denatured alcohol or a kitchen degreaser and let everything dry thoroughly.
For handles, I used a screwdriver to remove each one and kept all screws in a little box. If you plan to reuse the original screws with new handles, label them so you don’t end up mixing sizes.
How I installed the cabinet film
I chose a soft, warm white film with a subtle matte finish that would read like painted wood from across the room. Here’s the technique I used to avoid bubbles and misalignment:
Take your time with doors that have beading or grooves; you can make small relief cuts to fold the film neatly into recesses. If your film has a grain, align pieces so the grain runs consistently — this makes a big difference to the perceived quality.
Peel-and-stick backsplash tips
I used a single sheet behind the hob to act as a focal point rather than trying to cover the whole wall. A small area like that creates a bespoke feel without the cost or the effort of re-tiling.
Replacing handles for an instant upgrade
Handles are little details that read as purposefully chosen. I chose matte black handles in a slim, modern shape for a subtle contrast. They cost £2 each and felt like a small luxury. When replacing:
Safety, removability and deposit-friendly tips
My top priority as a renter is not losing my deposit. Peel-and-stick products tend to be removable, but there are caveats:
What I wish I’d known
There are a few small lessons I learnt the hard way:
Small finishing touches that make it feel bespoke
The peel-and-stick changes started the transformation, but the kitchen felt truly finished with a few tiny extras:
With these steps, my rented kitchen began to feel deliberate and calm, not temporary. It didn’t cost much, it was removable, and it gave me the confidence to cook and linger in the space. If you’re a renter wanting a kitchen that feels like it belongs to you, try one small area first — a single cabinet door or a tiny backsplash — and see how much of a difference a modest investment and intentional details can make.